Looking at a shiny new car or a freshly painted old car is like the first day of a honeymoon. At first, everything feels nice and easy, and you feel like you’re in seventh heaven. But soon the magic of the new beginning fades away.
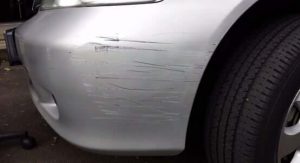
It’s the same as when you first see a scratch in the paint of your new car. Fortunately, this disappointment can be easily repaired, so don’t worry.
 Scratching your head won’t solve anything.
Sure, you can call in a professional to restore the original shine, but that’s very expensive. A better option is to learn how to do it yourself to save your hard-earned dollars and maintain it regularly so you never see those dreaded scratches again.
And of course, if you found this article, we can assume that you are already very familiar with cars and do-it-yourself repairs, right?
With a little work, I bet you’ll soon learn how to remove scratches from your car. It takes a little practice, but once you get the hang of it, it’s very easy.
Also Read: All About Car Polishing
 How do I remove light scratches on my white car?
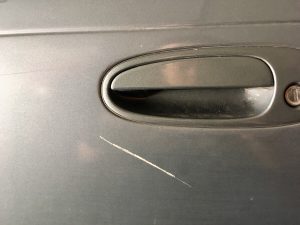
First, one must literally determine the depth of the problem in order to select the correct procedure. Scratches are removed differently depending on the depth of the paint surface. To qualify a scratch as “light”, a nail test is useful. Simply trace your fingernail over the scratch and if it does not scratch, it is OK.
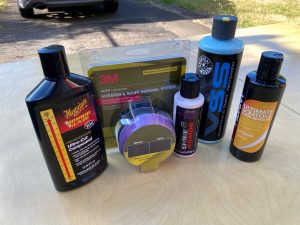
Light scratches are the easiest to remove (obviously). Fortunately, there are already a number of products designed to remove this type of scratch, usually called “scratch and swirl cleaners,” “scratch remover kits,” or “scratch doctors.
In some cases, toothpaste can be added. These are essentially less abrasive compounds. However, I tend to prefer to use products designed for the job, but if your budget is limited, you can try toothpaste first – you never know.
 What you need:
- Scratch removal kit or ;
- Polishing compound
- Scrubbing compound
- Several clean microfiber towels
Also Read: Driving With Bad Oil Pressure Sensor
Step 1. Preparation
Preparation is important because the surface must be clean. You do not want to make the situation worse by scratching it further with dust and dirt.
Wash the surface with water and car soap, rinse and dry.
Step 2 Rubbing compound
Next, take a clean microfiber towel and apply the rubbing compound to the scratch. Rub in a circular motion for about 1 minute. Be precise. You do not need to go over the scratch. Do not get carried away.
You can use a drill or car polisher set to pad and medium speed. Excessive speed, however, can burn the paint if not done properly. If you are unsure, it is best to do it by hand.
Step 3. Polishing compound
Wipe off excess polish and repolish the treated surface with a polishing compound to restore the original shine. This step is essentially the same as the previous step, but with a different product. It can also be done with a drill/buffer/polisher.
Repeat the process from step 4.
Wipe off the abrasive and inspect the scratch. If still visible, repeat the same operation one more time. After that, if it still remains, your scratch may have been classified as a “small” scratch.
Also Read: How to remove scratches from a windshield
 How to remove minor scratches on a While car
Small scratches on the car can be seen with the fingernail in the same way. In this article, we will introduce scratches that can stop nails. It can be caused by something minor and end up going unnoticed.
Hitting a branch in a field, rubbing your lunch in the trunk, or removing snow from your car in the winter can scratch the fragile paint of your car. The major difference between a “light scratch” and a “small scratch” is that a “light scratch” only damages the clear coat, while a “small scratch” can go further and reach the base coat.
What you will need
- Two clean microfiber towels
- Polishing pad
- Rubbing compound
- Polishing compound
- 3000 series wet sandpaper (optional)
Preparation for Step 1
Once again, wash the car thoroughly, concentrating on the scratched area first, and then dry it.
Step 2 Polishing agent
Apply the abrasive to the scratches with an abrasive pad. Scrub firmly and accurately from front to back. Continue for several minutes. You should see the scratches begin to disappear.
Step 3 Wipe off
Wipe with a clean microfiber towel to verify the results of the previous step.
Repeat step 4.
To avoid rubbing too hard and damaging the paint, and to ensure that the scratches are removed, repeat steps 2 four to five times.
Step 5. Polish the site.
Repeat step 3 and apply polish. Polish until the shine is equivalent to the car’s other paintwork.
Also Read: Car Noises That Should Alert You
 How to remove deep scratches on a white car
If the previous steps are inadequate, the damage may be deeper than expected. Deeper scratches require more work and a more specific approach. In this case, you have two choices: get your own hands dirty and save a lot of green, or hire a professional.
These scratches usually stand out well from a distance. Pebbles, light contact with a child’s bicycle, or a little help from a jealous neighbor’s keys are the culprits. But do not despair. There is a solution for everything.
What you need.
- Several clean microfiber towels
- 320 grit sandpaper
- 500 grit sandpaper
- 2000 grit wet sandpaper
- Masking paper
- Masking tape
- Primer spray for cars
- Car Paint Spray
- Clearcoat spray can
- Spray gun (optional)
Step 1. Preparation
Clean the surface again and let it dry before starting more serious work.
Step 2. Sanding
Begin sanding the scratched area with a sanding block and 320-grit sandpaper. Do not use sandpaper that is too coarse, as it will quickly sink into the paint. Stop as soon as the scratches disappear.
Work on as small an area as possible. Don’t pick it up and end up repainting the entire car.
Step 3 Rinse off.
Rinse off any debris and wash the area. Use a clean microfiber towel (or adhesive cloth) to wipe the surface free of dust and dirt.
Step 4. mask the site.
Cover the perimeter and adjacent panels with masking paper and tape the edges to prevent paint fumes from adhering to other parts of the car.
Step 5. Apply the primer.
There are two ways to do this. If you already have an air compressor at home, get a good spray gun. Not only will the job be done faster, but the finish will be better. However, spray guns are difficult to control and require some skill. In fact, if you don’t know how to properly set up and use a spray gun, it can easily drip paint.
When in doubt, just use a spray can. They are much easier to use and require no adjustment. However, it is not suitable for large surfaces and it is quite difficult to match the paint to the surrounding surfaces.
Once you decide which method to use, the procedure is very similar. Apply several coats of primer (two coats are usually sufficient if the bare surface is not polished) and allow to dry in approximately 15-minute intervals.
Also Read: What causes timing belt to break
Step 6. sanding the primer
When the primer is completely dry, sand with 320 grit sandpaper until smooth; finish with 500 grit sandpaper; sand with a sandpaper grinder until smooth; sand with a sandpaper grinder until smooth; sand with a sandpaper grinder until smooth.
Step 7. Select the appropriate paint.
Next, apply a coat of paint of a similar color to the area. Look at the sticker on the inside of the driver’s door and order the exact same paint as your car. Usually, there is a code on it, but you may need to check where it is listed in your car’s repair manual first, as this sticker always contains a variety of information.
Never rely on your own eyes when choosing paint. Never improvise once you know that there are at least 50 different grays.
If in doubt, contact the paint manufacturer.
Step 8. Basecoat
When using a spray gun, the base coat and reducer must first be mixed in the correct proportions. To ensure this, carefully follow the manufacturer’s recommendations. Incorrect mixing is increasingly harmful. If spray cans are used, they are already mixed and need not be bothered.
Spray from bottom to top, overlapping 50-75% at a time; after the first coat, make sure the substrate is almost completely covered and the color is uniform. Allow to dry and repeat this process one more time. If necessary, apply a third coat.
Step 9. Clear Coat
To spray a clear coat, the process is basically the same as for the base coat, except that the clear coat must be mixed with an activator (activator). If you are using a spray can be sure to check the paint in the can, as some cans already contain the clear coat, so this process can be omitted.
Spray the medium wet coat first (you will notice that the clear coat flows faster than the base coat). Repeat this process, but this time spray it “wet”. This will make the clear coat appear “transparent”.
Allow drying.
Step 10. Polishing
When the clear coat is completely dry, polish the surface so that the new paint surface matches the old.
That’s it!
Also Read: How Long Does a Car Battery Last
A final word.
You can turn a blind eye to scratches on your car, or you can do something about it yourself. No matter how deep the scratch is, there is always a way to fix it without paying a fortune to a repair shop.
All it takes is a few simple steps, some time spent surfing the net, a little practice, and a few dollars. After that, you will surely be able to look at your car with the same enthusiasm you had when you bought it.
How to Remove Scratches from Car | Video Explanation

Hi, I am David Bailey a dedicated writer from Linden Bridge School with a degree in mechanical engineering and a degree in marketing. I strive to simplify complex subjects and like to explain complex and technical matters in an easy-to-understand manner. Read More Here
